一、简介
Zabbix的开源监控工具:
Smiple Network Management Protocol简称
SNMP,SNMP常见的有三种工作模式:NMS(Network Manager System)主动向Agent采集数据;Agent向NMS报告数据;NMS请求Agent修改配置信息。
SNMP常用组件:
- MIB(Management Information base)管理信息库,每个agent端具有此组件;
- SMI(Subject Management Information) MIB的表示符号 ;
- SNMP协议
SNMP基于UDP协议进行工作,其NMS端监控161端口,Agent监控162端口。Zabbix的监控功能一般基于Agent、ssh、SNMP、IPMI(Intelligent Platform Management,即智慧平台管理接口)来实现。
Zabbix产生的数据主要由四部分组成:
- 配置数据:较小;
- 历史数据:每次采集的数据大小:50字节(Bytes)
- 历史趋势数据:128字节(Bytes)
- 事件数据:130字节(Bytes)
二、安装配置
1.安装zabbix仓库
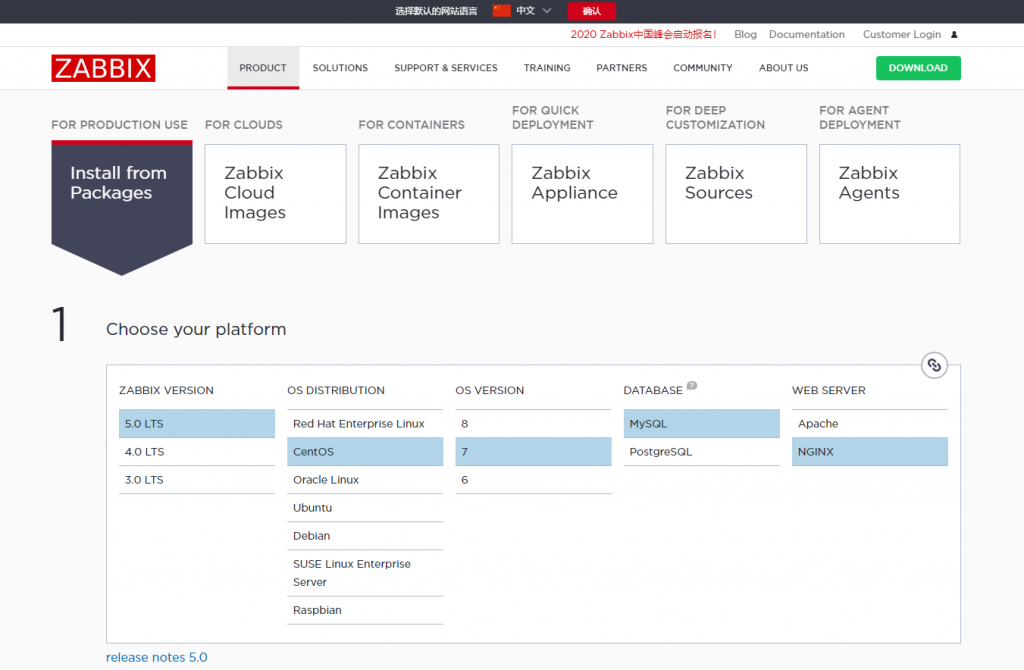
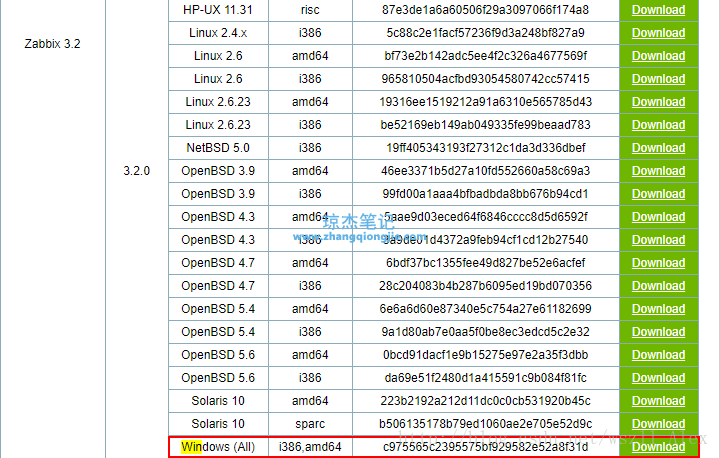
zabbix官方下载地址:https://www.zabbix.com/download, 根据自己硬软件架构的不同,可以选择不同的下载模式。
[root@master01 ~]# rpm -Uvh https://repo.zabbix.com/zabbix/5.0/rhel/7/x86_64/zabbix-release-5.0-1.el7.noarch.rpm
若使用官方仓库安装报错,可以配置其他zabbix的yum源(清华或者阿里云或163)尝试:
vim /etc/yum.repos.d/zabbix.repo

[zabbix]
name=Zabbix Official Repository - $basearch
baseurl=https://mirrors.aliyun.com/zabbix/zabbix/5.0/rhel/7/$basearch/
enabled=1
gpgcheck=1
gpgkey=file:///etc/pki/rpm-gpg/RPM-GPG-KEY-ZABBIX-A14FE591

[zabbix-frontend]
name=Zabbix Official Repository frontend - $basearch
baseurl=https://mirrors.aliyun.com/zabbix/zabbix/5.0/rhel/7/$basearch/frontend
enabled=0
gpgcheck=1
gpgkey=file:///etc/pki/rpm-gpg/RPM-GPG-KEY-ZABBIX-A14FE591

[zabbix-debuginfo]
name=Zabbix Official Repository debuginfo - $basearch
baseurl=https://mirrors.aliyun.com/zabbix/zabbix/5.0/rhel/7/$basearch/debuginfo/
enabled=0
gpgkey=file:///etc/pki/rpm-gpg/RPM-GPG-KEY-ZABBIX-A14FE591
gpgcheck=1

[zabbix-non-supported]
name=Zabbix Official Repository non-supported - $basearch
baseurl=https://mirrors.aliyun.com/zabbix/non-supported/rhel/7/$basearch/
enabled=1
gpgkey=file:///etc/pki/rpm-gpg/RPM-GPG-KEY-ZABBIX
gpgcheck=1
2.关闭selinux,并重启虚拟机
[root@master01 ~]# vim /etc/selinux/config

# This file controls the state of SELinux on the system.
# SELINUX= can take one of these three values:
# enforcing - SELinux security policy is enforced.
# permissive - SELinux prints warnings instead of enforcing.
# disabled - No SELinux policy is loaded.
SELINUX=disabled
# SELINUXTYPE= can take one of three values:
# targeted - Targeted processes are protected,
# minimum - Modification of targeted policy. Only selected processes are protected.
# mls - Multi Level Security protection.
SELINUXTYPE=targeted
3.安装zabbix server和Agent
[root@master01 ~]# yum install zabbix-server-mysql zabbix-agent yum-utils
4.安装zabbix前端
安装红帽的 Software Collections仓库,便于后续安装高版本的 php,默认 yum 安装的 php 版本为 5.4 过低
[root@master01 ~]# yum install centos-release-scl -y
编辑文件/etc/yum.repos.d/zabbix.repo,并启用zabbix-frontend repository
[zabbix-frontend]
...
enabled=1
...
安装zabbix前端软件包
[root@master01 ~]# yum install zabbix-web-mysql-scl zabbix-nginx-conf-scl
5.安装数据库
由于使用 yum 安装 zabbix,不自动依赖安装数据库,因此需要手动安装数据库,这里使用 yum 安装 centos7 默认的 mariadb 数据库
[root@master01 ~]# yum install mariadb-server -y
6.启动数据库,并配置开机自动启动
[root@master01 ~]# systemctl enable --now mariadb
7.使用以下命令初始化 mariadb 并配置 root 密码
[root@master01 ~]# mysql_secure_installation
此时会进入mariadb的配置选项栏,一般先敲回车进行重置root密码,然后一路敲y即可完成初始化配置。
8.创建zabbix数据库并配置相应账户和权限
# mysql -uroot -p
password
MariaDB [(none)]> create database zabbix character set utf8 collate utf8_bin;
Query OK, 1 row affected (0.00 sec)

MariaDB [(none)]> create user zabbix@localhost identified by "zabbix@123";
Query OK, 0 rows affected (0.00 sec)

MariaDB [(none)]> grant all privileges on zabbix.* to zabbix@localhost;
Query OK, 0 rows affected (0.00 sec)

MariaDB [(none)]> quit;
Bye
9.导入zabbix初始化数据信息,提示输入刚设置好的密码
[root@master01 ~]# ls /usr/share/doc/zabbix-server-mysql-5.0.3/
AUTHORS ChangeLog COPYING create.sql.gz double.sql NEWS README
[root@master01 ~]# zcat /usr/share/doc/zabbix-server-mysql*/create.sql.gz | mysql -uzabbix -p zabbix
Enter password:
10.配置zabbix数据库信息
编辑配置文件/etc/zabbix/zabbix_server.conf
DBPassword=zabbix@123 # 配置zabbix配置信息里面的数据库密码
11.为配置zabbix前端配置PHP信息
编辑PHP配置文件/etc/opt/rh/rh-nginx116/nginx/conf.d/zabbix.conf,将’listen’ 和’server_name’选项取消注释
listen 80;
server_name 192.168.239.130;
编辑配置文件/etc/opt/rh/rh-php72/php-fpm.d/zabbix.conf,增加listen.acl_users
listen.acl_users = apache,nginx
取消注释,设置正确的时区(根据实际地区填写)
php_value[date.timezone] = Asia/Shanghai
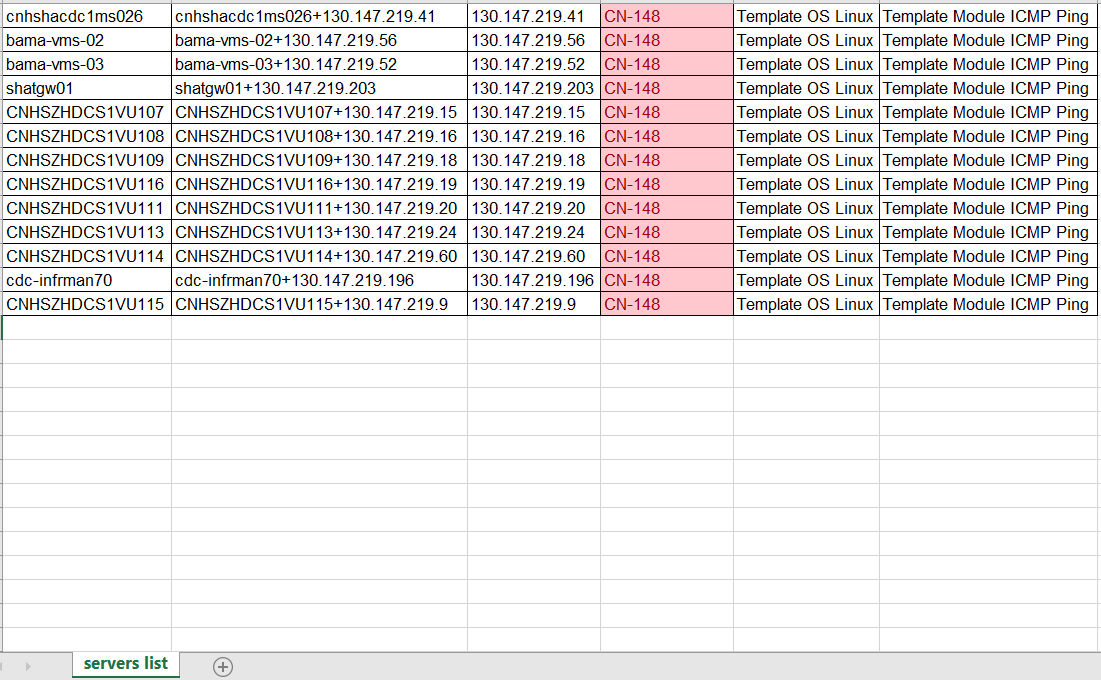
12.Zabbix监控客户端
zabbix监控客户端一般通过Zabbix Agent或者SNMP的方式
Agent监控10050端口;
SNMP监控161端口;
配置zabbix agent
agent下载地址:https://www.zabbix.com/downloads/5.0.3/zabbix_agent-5.0.3-linux-3.0-amd64-static.tar.gz
修改配置文件/etc/zabbix/zabbix_agentd.conf,修改如下几项:
您暂时无权查看此隐藏内容!
配置SNMP
[root@node01 ~]# yum install net-snmp
13.启动zabbix服务端server和客户端agent的相关进程,并设置开机自启
[root@master01 ~]# systemctl restart zabbix-server zabbix-agent rh-nginx116-nginx rh-php72-php-fpm
[root@master01 ~]# systemctl enable zabbix-server zabbix-agent rh-nginx116-nginx rh-php72-php-fpm
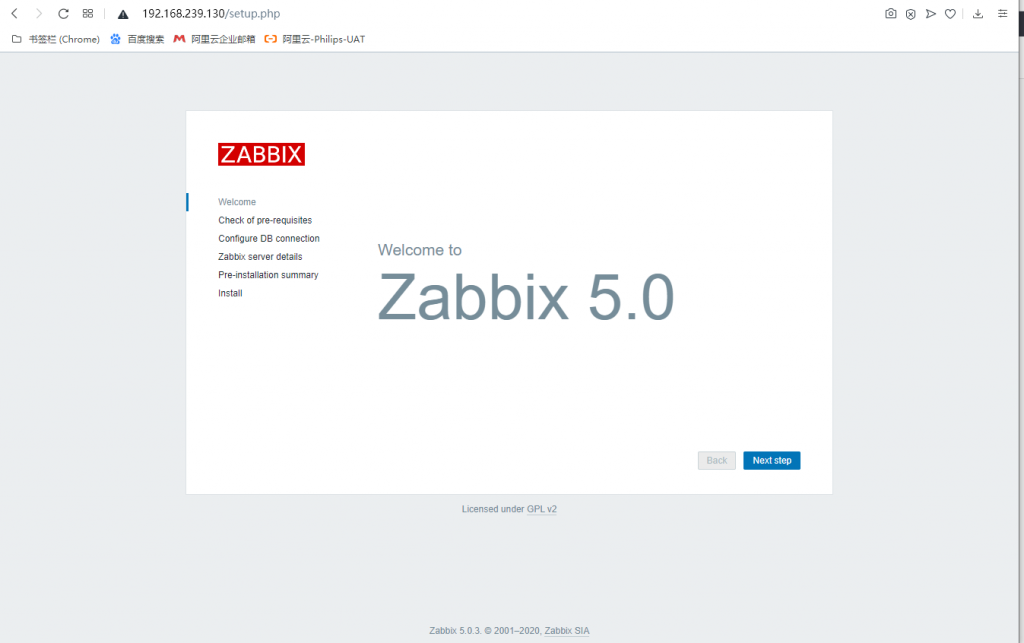
14.进入zabbix网页配置页面进行配置
默认用户名为Admin,密码为zabbix


评论前必须登录!
注册