Ansible常用模块文件操作
[root@tiandong etc]# ansible-doc -l 列出ansible所支持的模块
[root@tiandong ~]# ansible-doc -s ping(模块名) 可以查看模块的详细信息

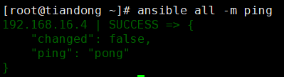
Ping模块
[root@tiandong ~]# ansible all -m ping
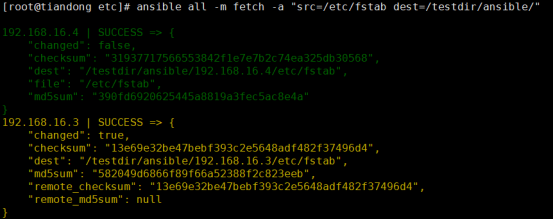
Fetch模块
从远程主机拉取文件到ansible
[root@tiandong etc]# ansible all -m fetch -a “src=/etc/fstab dest=/testdir/ansible/”
表示调用fetch模块 -a选项用于传递模块所需要的参数
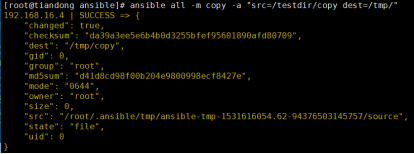
Copy模块
复制ansible上的文件文件到远程主机。
[root@tiandong ansible]# ansible all -m copy -a “src=/testdir/copy dest=/tmp/”
在远程主机/tmp目录下面生成文件copy
[root@tiandong ansible]# ansible all -m copy -a “src=/testdir/copy dest=/tmp/ force=no”
当远程主机已经存在复制的文件时,不会执行任何操作
当返回信息为绿色,’changed’为false,表示ansible没有进行任何操作

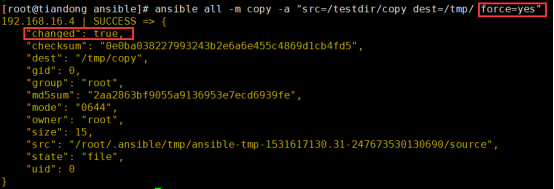
[root@tiandong ansible]# ansible all -m copy -a “src=/testdir/copy dest=/tmp/ force=yes”
若force为yes的话会执行操作覆盖之前的文件
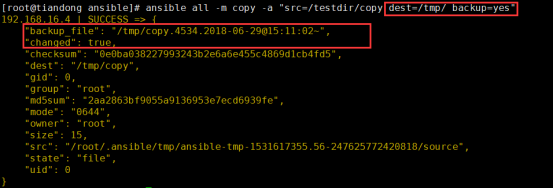
[root@tiandong ansible]# ansible all -m copy -a “src=/testdir/copy dest=/tmp/ backup=yes”
在拷贝之前会将源文件重命名已做备份,然后进行复制。
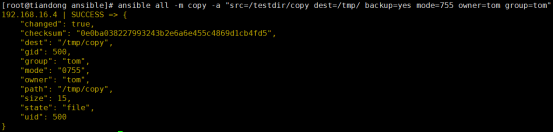
[root@tiandong ansible]# ansible all -m copy -a “src=/testdir/copy dest=/tmp/ backup=yes mode=755 owner=tom group=tom”
拷贝文件时制定文件的属主、属组、权限
[root@tiandong ansible]# ansible all -m copy -a “content=’welcom to beijing’ dest=/tmp/test”
在远程主机上生成文件test,内容为’welcom to beijing’
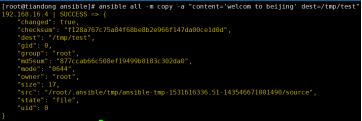
在远程主机上查看文件:
![]()
UNARCHIVE模块
unarchive模块:http://docs.ansible.com/ansible/unarchive_module.html
功能:解压缩,这个模块有两种用法:
1、将ansible主机上的压缩包在本地解压缩后传到远程主机上,这种情况下,copy=yes. 本地解压缩,解压缩位置不是默认的目录,没找到或传完删了 后传到远程主机
2、将远程主机上的某个压缩包解压缩到指定路径下。这种情况下,需要设置copy=no 远程主机上面的操作,不涉及ansible服务端
参数:
copy:默认为yes,当copy=yes,那么拷贝的文件是从ansible主机复制到远程主机上的,如果设置为copy=no,那么会在远程主机上寻找src源文件
src:源路径,可以是ansible主机上的路径,也可以是远程主机上的路径,如果是远程主机上的路径,则需要设置copy=no
dest:远程主机上的目标路径
mode:设置解压缩后的文件权限
命令演示:
ansible pms -m unarchive -a 'src=/srv/tomcat8/apache-tomcat-8.0.29.tar.gz dest=/usr/local copy=no mode=0755'
File模块
可以进行文件的基本操作,创建(删除)文件或者目录、修改文件权限
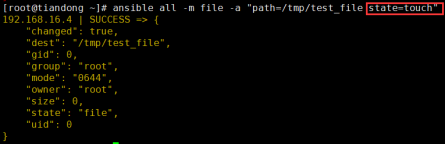
[root@tiandong ~]# ansible all -m file -a “path=/tmp/test_file state=touch”
在远程主机上创建test_file的文件。若文件存在会更新文件的时间戳
[root@tiandong ~]# ansible all -m file -a “path=/tmp/test_dir state=directory”
在远程主机上创建test_dir的目录,若目录存在不进行任何操作。

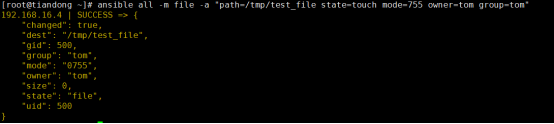
[root@tiandong ~]# ansible all -m file -a “path=/tmp/test_file state=touch mode=755 owner=tom group=tom”
在远程主机上创建文件指定权限或者,修改属主或者属组
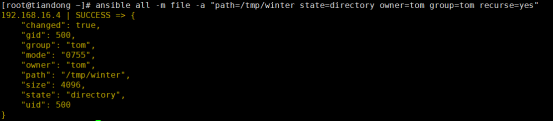
[root@tiandong ~]# ansible all -m file -a “path=/tmp/winter state=directory owner=tom group=tom recurse=yes”
操作远程主机的目录时,递归的将目录中的文件的属主属组设置为tom
[root@tiandong ~]# ansible all -m file -a “path=/tmp/test_file state=absent”
删除远程主机端的文件或者目录

Blockinfile模块1:
[root@tiandong ~]# ansible all -m blockinfile -a “path=/tmp/rc.local block=’service restart sshd\nservice restart httpd'”
在文件末尾插入两行
![]()
在远程主机上查看:
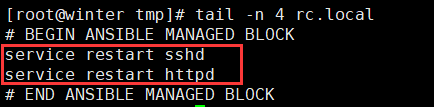
# BEGIN ANSIBLE MANAGED BLOCK # END ANSIBLE MANAGED BLOCK是blockinfile模块自动添加的文本快标记。
[root@tiandong ~]# ansible all -m blockinfile -a “path=/tmp/rc.local block=’service restart iptables’ marker=’#{mark} service to restart'”
使用marker可以自定义文本快标记。
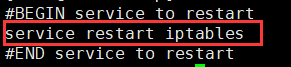
当#{mark} service to restart这个标记已经存在于文本中:
block对应的内容与之前的内容不同,这样对应的文本块内容会被更新而不是插入在末尾。
Block对应的内容为空,删除对应的文本块。
![]()
[root@tiandong ~]# ansible all -m blockinfile -a “path=/tmp/rc.local marker=’#{mark} service to restart’ state=absent” 这样依然可以删除对应的文本块
![]()
使用将state的值设置为absent,删除对应的文本块。
默认文本块是插入在文件末尾的,可以将文件块插入指定的位置
[root@tiandong ~]# ansible all -m blockinfile -a “path=/tmp/rc.local block=’###blockinfile test###’ marker=’#{mark} test’ insertbefore=BOF”
在文件的开头插入。

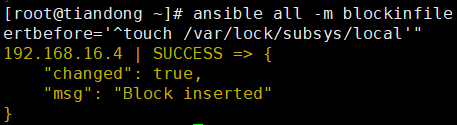
[root@tiandong ~]# ansible all -m blockinfile -a “path=/tmp/rc.local block=’###blockinfile test reg###’ marker=’#{mark} test reg’ insertbefore=’^touch /var/lock/subsys/local'”
根据正则表达式插入
[root@tiandong ~]# ansible all -m blockinfile -a “path=/tmp/rc.local marker=’#{mark} test’ state=absent backup=yes”
使用backup参数,在删除模块的时候先进行备份在进行删除。
![]()
[root@tiandong ~]# ansible all -m blockinfile -a “path=/tmp/create_test block=’create test’ marker=’#{mark} test’ create=yes”
使用create参数,当文件不存在时进行创建
![]()
blockinfile模块2
Replace模块
根据指定的正则表达式替换文件中的字符串,所有匹配到的都会被替换
[root@tiandong ansible]# ansible all -m replace -a ‘path=/tmp/test regexp=”winter” replace=WINTER’

查看被控制端的文件:
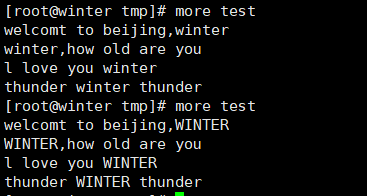
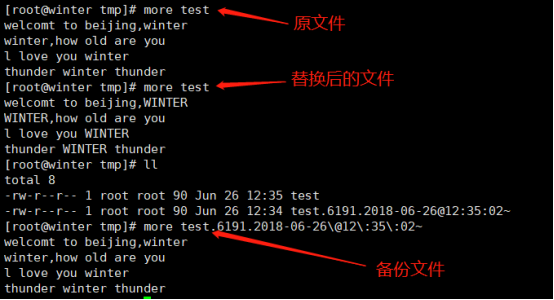
[root@tiandong ansible]# ansible all -m replace -a ‘path=/tmp/test regexp=”winter” replace=WINTER backup=yes’ 该参数在替换之前进行备份

查看被控制端:
参考琼杰笔记相关文档:
ansible之playbook的使用方法总结


评论前必须登录!
注册